About Invoices in Oracle EBS.
Whenever your company receives any goods or avail any services from suppliers you will receive a invoice for the goods received or availed services. In Oracle E-Business suite, we have Oracle Payables module where we have to enter the information for all the invoices.
Invoice Structure
Every invoice can be divided into two parts
- Invoice Header
- Invoice Lines
Invoice Header
The invoice header defines the common information about the invoice: invoice number and invoice date, vendor information, remittance information, and payment terms. Information specified at the invoice header level is common to every line item.
Invoice Lines
The invoice lines define the details of the goods and services as well as the tax, freight, and miscellaneous charges invoiced by the vendor. There can be multiple invoice lines for each invoice header.
Many companies receives hundreds of invoices daily. To record these invoices Oracle Payables has provided two methods to enter these invoices in Oracle EBS system.
- Invoice Workbench
- Quick Invoices Window
Invoice Workbench
Workbench consists of Invoice Batches window, Invoices window, You can use this method to enter invoices directly into Oracle Payables. Whatever invoice you enter through workbench the Oracle Payables module will automatically validate it. Users usually use this method to enter complex invoices which require online validation.
Quick Invoices Window
This method is used if you need to enter lot of invoices quickly that do not require extensive validation and defaults. After entry, you import these into the Payables system. Validation and defaulting occur during import operation.
In this article we will see step by step on how to enter invoices through Quick Invoices Window. (At the end we will see how to automate loading of invoices using Data Loader)
Suppose we have received the invoices - like as shown below, from suppliers and we need to enter these into Oracle Payables module.
Prerequisite
Before entering invoices, please make sure you have defined the supplier information in the Enter Supplier window with at least one Site for each supplier.
Step 1:
Login to Oracle EBS and navigate to Payables Responsibility -> Invoices : Entry -> Quick Invoices
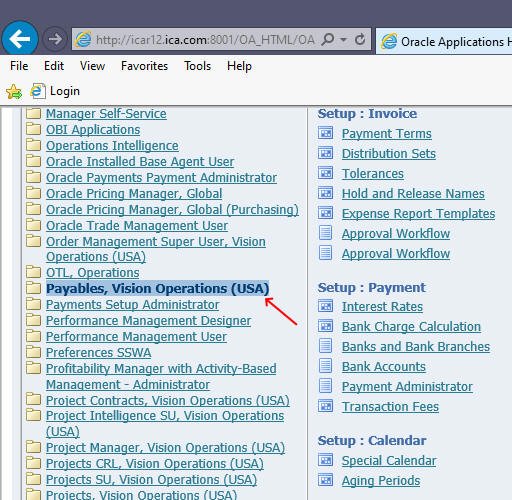
Once you click Payables responsibility, you will get the list of applications within that responsibility on the right panel. Scroll to top and and select Invoice - Entry -> Quick Invoices as shown below (don't confuse with Invoices : Inquiry, which is for querying only)
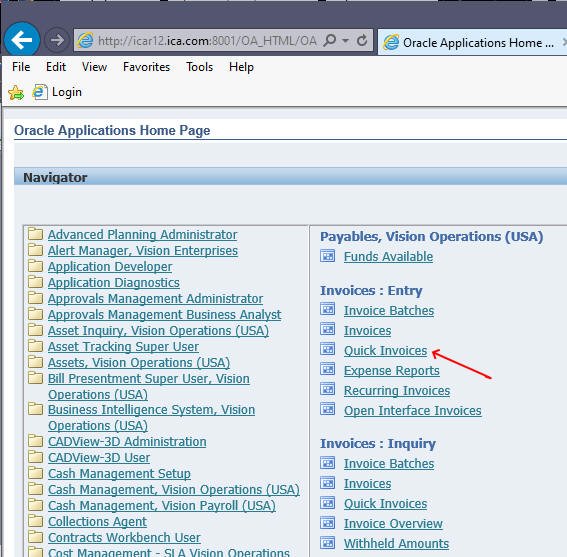
Since Quick Invoices application form is Java based, the form will open in a separate applet window as shown below
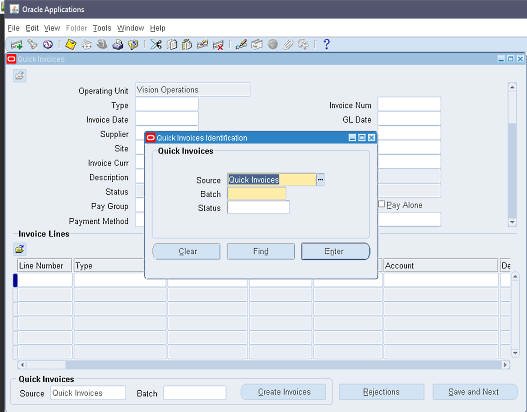
Whenever you need to enter a group of invoices, Oracle will prompt you enter the batch name, this batch name will stored along with each invoice you enter later on. The batch name can later on be used to identify the invoices.
Now, leave source name field to its default value and enter T001 as batch and press OK button, then you will get a window with Invoice Header and Invoice lines as shown below
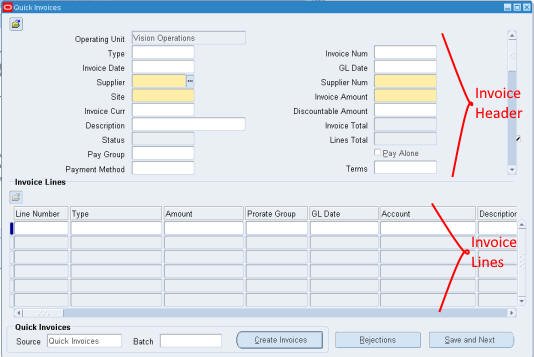
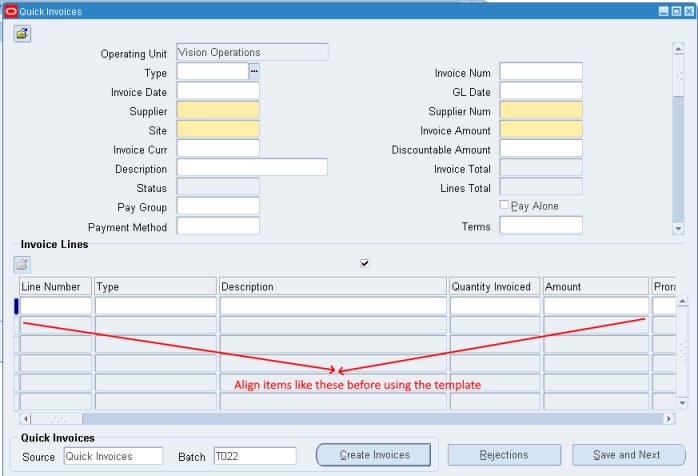
Note: You can rearrange items or change width of the items in Invoice Lines section by clicking and dragging on fields header to suit your requirements i.e. you can drag description from to left side after line number etc.
Minimum require fields in Invoice headers are
Supplier Name OR Supplier Number
Supplier Site
Invoice Amount
Beside the above every invoice must have at least one Line Item. And for each line item the following fields are required
Line Type (e.g. Item, Tax, Miscellaneous, Freight etc.)
Amount
An invoice might contain one or more line items
For more information please refer to Oracle Payables User Guide
In this tutorial we will enter a sample invoice as shown below with the following information
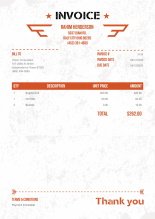
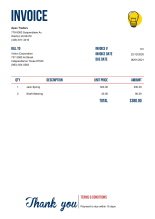
Invoice Type (Standard)
Invoice Num (Invoice number of the supplier)
Invoice Date (Date on the invoice)
Supplier Name
Supplier Site
Terms (Payment Terms, whether immediate, NET30 etc)
Invoice Amount
And for line items we will enter the following
Line Type
Description
Qty
Amount
Step 2
Enter the values in the proper fields for first sample invoice in the invoice header as shown below
And then enter the line items as per invoice as shown below.
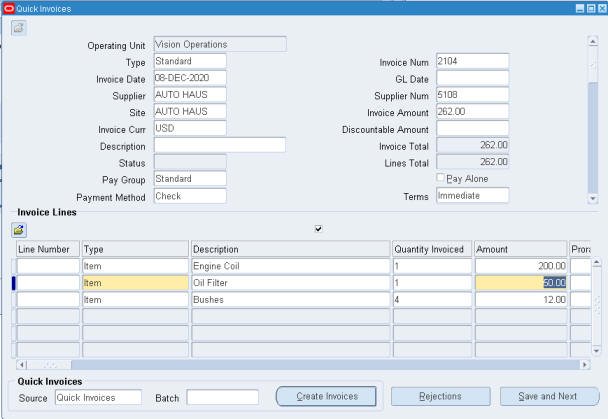
After entering the necessary fields click Save and Next to enter the next invoice.
Similarly enter the second invoice and click save and exit.
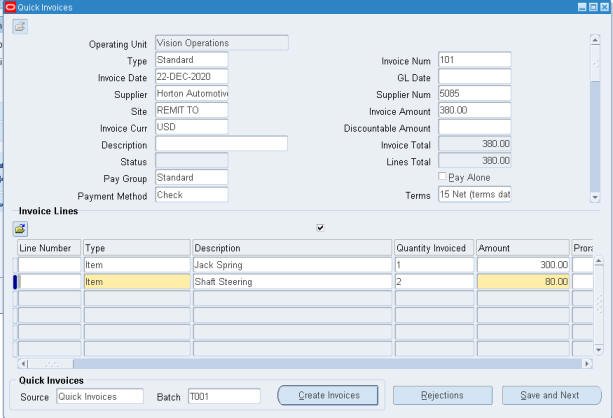
After you have entered all the invoices you can click "Create Invoices" button to import the just entered invoices.
Then Oracle will submit the request and it will show the request ID in the dialog box as shown below. You can note down this request ID on find out the outcome of these import later on.
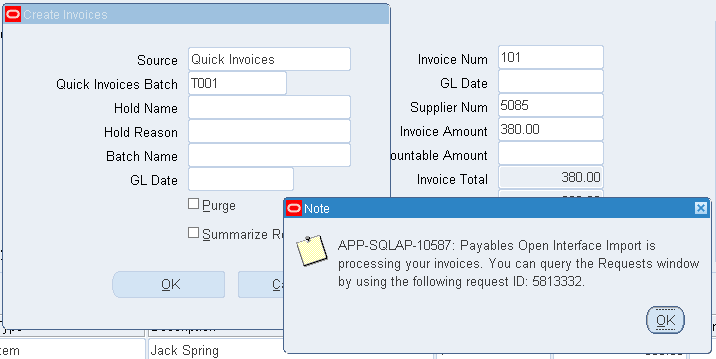
Remember whatever Invoices you have entered here are not validated. Only at the time of importing Oracle will validate the invoices and will reject invoice if it finds any invalid data.
Using Data Loader for entering invoices
If you need to enter 100's or 1000's of invoices, then you can automate loading by using Macro Loading or Forms Record & Playback method in Data Loader
Here is a sample Data Loader template which can be used to enter invoices using Quick Invoices window.
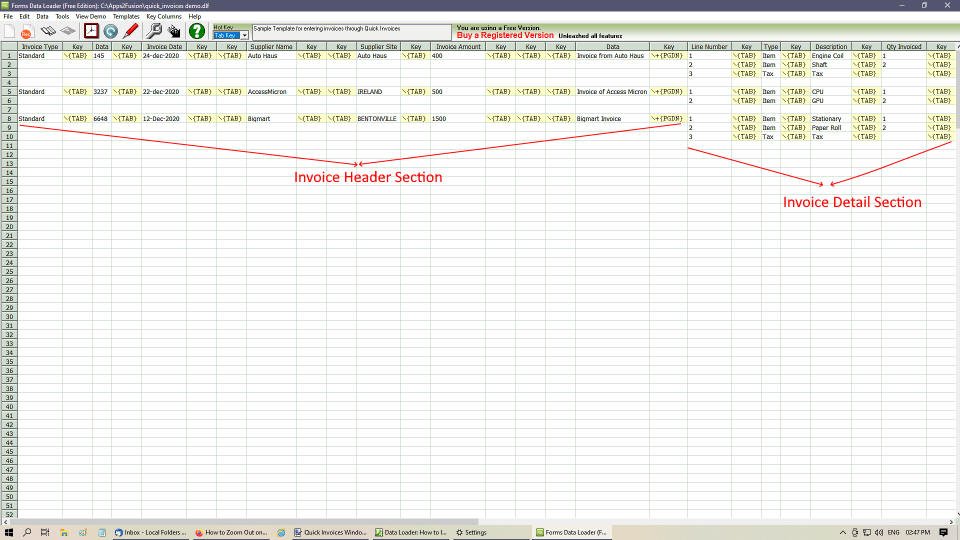
Before using this template please make sure you have arranged the Quick Invoices Line items according to the following order
- Line Number
- Type
- Description
- Quantity Invoiced
- Amount
Tip: You can align / move columns in Oracle Forms by clicking on its column heading and dragging to the desire position